My Top Five New Plants

Well, it is a new year, I have a new haircut, and it’s time to talk about what is going to be new in the garden this year. I try every year to have lots of new things mixed in with the old stalwarts, But today I have 5 new plants that I am really excited about adding to the gardens.


This first plant-Hypericum perforatum or Saint John’s Wort- “Topas”, is a plant we picked up at the Occidental Arts and Ecology Center nursery the last time we were over in that area. This nursery is awesome. It is small, well, ok, it is tiny, but they have things you will not find anywhere else, and it is all grown organically and regeneratively to boot! The next time you are up in the Napa/Sonoma wine region this nursery is worth the time. And leave some time for some good Italian food in the town of Occidental CA.

Image of Hypericum perforatum

Image CC BY-SA 3.0 by H. Zell

We grow a number of different herb plants here in our gardens. While we have not grown this plant here, a neighbor has a big patch of it. They seem to be very deer resistant and frost hardy-two prime consideration here- and they are great for pollinators. This plant has yellow flowers that are really loved by the pollinators I am looking forward to the blooms. It will definitely be a plant I harvest for teas. Tea made from this plant has been found to be helpful for fighting depression. (Ng)


Another plant we picked up is this Phlox Subulata or moss phlox. This is a low growing creeping ground cover. We need lots of ground cover plants here to help keep the soil cool and supportive of the little things that dwell in the soil. It flowers in the blue-red spectrum, providing the pollinators with the pollen and nectar they need. I know exactly where I want to put it outside one of the gardens. If it does well, then you know we will be propagating and buying more!

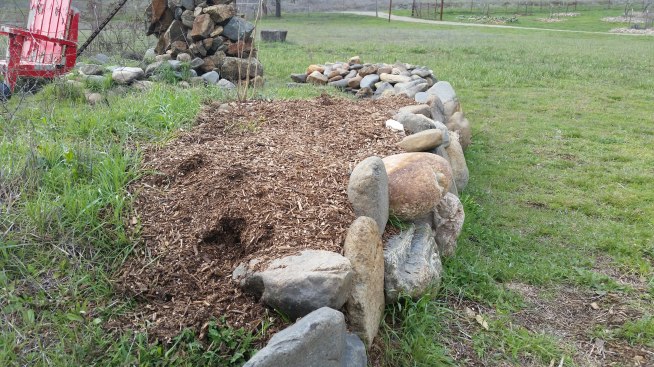
These ground covers play a number of roles in our gardens. Keeping the ground covered, whether by plants or by mulch, is vital for the soil food web. The cover keeps the soil temperature down, and it slows the evaporation of water from the soil. Soil that is both moist and cool is more beneficial to the many organisms that live in the soil. These organisms then produce humus, which is sequestered carbon. The carbon, in turn, allows the soil to hold more moisture. (Ingham)  The moisture in the soil, in turn, allows the plants to be more fire resistant, which is one of my primary goals for the land!

Picture of Luther Burbank

Photo from Luther Burbank.org


This next plant I ordered last spring after visiting the Luther Burbank Garden in Santa Rosa. Ca. If you haven’t been there, you need to go. Luther Burbank was an incredible plant breeder, if not a bit of a charlatan, being responsible for many of the plants we all enjoy today. This particular plant is the Luther Burbank Thornless Prickly Pear.  I ordered this from Territorial Seed Company up in Springfield, Oregon. The legend has it that Luther Burbank was on a train ride through the desert in the eastern part of California and noticed all the cactus with their big thorns, and thought if he could breed out the thorns and ranchers could use the thornless cactus for cattle feed. Well, that didn’t work out, as the plant wasn’t all that he claimed it would be. It turns out the plant may not have been developed by Burbank after all. Rather, it may simply be a selection of one of the many thornless prickly pears grown by Native Americans in the South West. (Dreyer) But I do love the fruits, and many folks love eating the fronds. That is something I will need to learn about when this plant gets to harvest size.


Image of Perennial Kale

Image from ExperimentalFarmNetwork.org

Next up is this packet of seeds from the Experimental Farm Network. Check this out: Homesteader’s Kaleidoscopic Perennial Kale Grex. They had me at kale, but perennial? What the what? Put those two together and I just have to have it. We will see how it goes.


Image of Strawberries

Image from Rareseeds.com

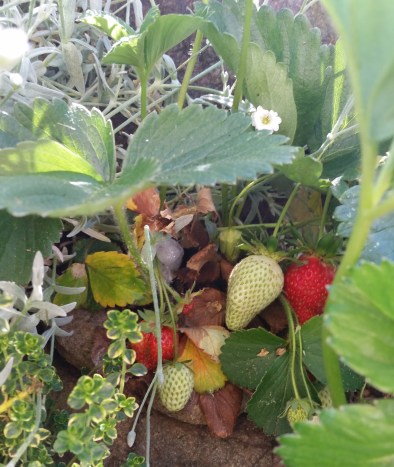
And lastly, but for sure not the least, is this packet of seeds from Baker Creek Seed Company, one of my favorite seed companies. I have gotten so many seeds from these folks. It is like I just have to give them my money. Really. These seeds are of Golden Berry Red Wonder Wild Strawberries or Fragaria vesca. Someone might say “but Mark, you already have so many strawberries. Why do you need more.” To that, I would answer with a pained look, and say “they are strawberries. You can never, ever have too many strawberries. If you can’t see that, you can’t be my friend!” Not really, you can still be my friend.

Now I am off to plant these seeds. I will see you next time I am looking at you. Until then, take care of yourself, take care of each other, and take care of the planet.

*This post was updated to include a higher quality video.


Works Cited

“CALIFORNIA CHAPARRAL INSTITUTE.” Top Chaparral Critters, http://www.californiachaparral.com/bprotectingyourhome.html.

Dreyer, P.  THE PRICKLY LUTHER BURBANK “I See by the Papers…” comstockhousehistory.blogspot.com/2011/06/prickly-luther-burbank.html.

Ingham, E. R. “Natural Resources Conservation Service.” What Is Soil Conservation? | NRCS, http://www.nrcs.usda.gov/wps/portal/nrcs/detailfull/soils/health/biology/?cid=nrcs142p2_053868.

Ng, Q X, et al. “Clinical Use of Hypericum Perforatum (St John’s Wort) in Depression: A Meta-Analysis.” Current Neurology and Neuroscience Reports., U.S. National Library of Medicine, 1 Mar. 2017, www.ncbi.nlm.nih.gov/pubmed/28064110.

Plants Profile for Ledum Groenlandicum (Bog Labrador Tea), plants.usda.gov/java/charProfile?symbol=PHSU3.

Acorns


Living here in a very rural corner of the Sierra Foothills of California we are blessed with a number of old (and some young) oak trees. We use some of the trees as a wonderful source of leaves. When I was a boy, some 50 years ago,  I remember my dad taking me to the nursery to get fertilizer for the garden. He would buy a bag or two of what was labelled as oak leaf mold. He said that was the very best stuff for a garden. Fast forward to now, I haven’t seen oak leaf mold sold in stores in decades. But we have been making it here in our gardens for years. We just rake the leaves up and dump them in the beds. Or dump them in a compost pile, whichever was needed.

But this year I wanted to see if I could get even more out of the oak trees. I decided to gather the acorns and see how much food I could make out of these big oak trees! Knowing myself enough to know I would not enjoy kneeling on the ground gathering these nuts, I sprung and purchased a very cool tool that would do much of the work for me! The nut wizard I bought did a very good job of gathering the nuts! My only complaint was where we have pea gravel on footpaths the tool gathered nuts and gravel. This added a lot of work separating the nuts from the rocks. I will need to figure that out for next year.

I put the gathered nuts in buckets of water in order to separate the good ones from the bad ones (the bad ones float.) This led to another issue. Some of the nuts grew mold before they were dry. This will be easily remedied next year with a better drying station. Or, I could gather them more in line with the way the Native Americans did it and not wait for the acorns to fall of their own accord.

At this point, I have a couple buckets of dry unshelled acorns. Soon I will remove the kernels from the shells and further process them into flour and then, hopefully, delicious food!

Fall Chores

Fall, with it’s cooler days, means it is time to clean up the garden and prepare it for winter. I grew a little patch of corn, pumpkins, and beans. You know The Three Sisters. I had never made a serious attempt at this before, but it worked out fine. With the crop in and the remaining plant matter frost killed, it was time to cut everything back and plant the winter cover crop. But not in that order.

I am using a technique called ‘throw sow’ I first learned about throw sow when I read the book One Straw Revolution. In the book, Masanobu Fukuoka described how he would harvest the crop of the prior season, and then cast handfuls of seed around the plot, and then chop down the crop residuals to cover and mulch the seeds. Because I am not as young and spry as I once was, casting seeds about seems much more fun than stooping over to plant each individual seed the traditional way!

It has been found that there is a tremendous benefit to planting multiple species of plants in a single plot. Since my primary purpose for the bed this winter is to be a cover crop, increasing the nutrient and carbon content of the soil, I mixed some rye, hairy vetch, and clover seeds and soaked them in water overnight. The pre-soaking of seeds has been found to soften the outer shell of the seed, allowing for faster germination, among other things. The following day I drained the seeds and threw handfuls of seed around the plot that still had the dried corn stalks standing and frozen pumpkin plants covering the ground. I then proceeded to chop and drop the remaining plant material. The chopped plant material now serves as a mulch, covering the seeds and soil allowing the soil food web do its thing.

That is it. The bed is now planted and is on its way to spring!

Screen Shot 2018-12-31 at 9.13.12 PM

What about the deer?

We typically have two kinds of gardens in our neighborhood; fenced and unfenced. Our unfenced gardens have things like lavender, sage, rosemary, and other plants that deer typically do not like. Everything else goes behind a fence. All of the annuals and vegetables go behind a fence, lest the deer eat them all. When I say all, I mean the real all. The deer ate everything!

I have tried a number of times to try to grow annuals outside of the deer fence. At first, I just planted things like I always did- make a raised bed and plant. As soon as anything green appeared, it just as suddenly disappeared. I read about Sepp Holzer‘s throw sow method of growing and Masanobu Fukuoka’s techniques tried them. I thought maybe I just needed a diversity of crops planted very closely. I mixed together a variety of seeds and soil and cast them on the ground. Things soon sprouted, and just like previous attempts, they disappeared.

I knew it possible to grow in this area without fences because Matt Powers was doing it in a very similar area to the south of us. I had seen it work. I just had to figure it out.

This spring I had a bunch of seeds that had been lying around that I knew I would not ever get to plant in our fenced vegetable garden. There was just not enough room, and there was never going to be enough room. What the heck I thought, Why not give it a try. I mixed a bunch of seeds together- corn, amaranth, squash, radishes and anything else that was lying around. I soaked them overnight, mixed in some compost, and spread it willy-nilly in an area I had cleared. With our huge bird and squirrel populating I thought I needed to cover the seeds more, but I didn’t have any more compost. I grabbed some trimmers and went and trimmed a bunch of plants to use as mulch.

Garden picture

This patch of annual vegetables is on the outside of the deer fence. As seedlings, they were protected only with a thin mulch layer trimmed from deer resistant shrubs.

I week or so later I could see the little plants under the mulch! They hadn’t been eaten! They kept getting bigger and bigger, and the deer were pretty much ignoring them! It was the mulch that mattered. In one section I had used artemisia trimmings. Deer never touch that plant. I also had a section covered with trimmings from heavenly bamboo, and in the middle section, I used oregano trimmings. Three plants that I knew deer don’t touch. When looking at it now I can see that the deer did, in fact, browse down the middle oregano section. But the other two sections are doing very nicely indeed. Better even than the plants I started indoors and transplanted after danger of frost.  The only question will be if the plants mature before the killing frost comes. In the best case, I have a whole new huge growing area.  In the worst case, I will have a lot of biomass and a bunch of green pumpkins to put into a curry. Either way, I will call it a win.

Making Compost

It is springtime and that means it is time to get seriously into making some compost. I have always had a bunch of compost piles; I have a worm bin to process kitchen scraps, I keep a moldering pile that processes clippings from around the property, and in the spring- around now- I start building some thermophilic piles. I always start the season by tearing down the moldering pile.

Picture of wheelbarrow, screen, and compost.

The last of the moldering compost going through the screen. The thermophilic piles are in the background

The moldering pile is about three to four feet high and about 8 feet across, in a circle. It is contained by an old strip of four-foot high fencing wire. In late summer and fall, I begin filling the pile with whatever plant material I have. I don’t do anything to the pile, I just pile stuff in it. In the spring I open it up and run it all through a 1/2 inch hardware cloth screen. Things that fall through the screen go onto the various beds around the property. The things too big to fit through the screen get set aside to be used in the thermophilic piles. Some large woody pieces repeat this cycle over several years.

This year I paid particular attention to exactly what was going through the screen. I noticed there was a lot of non-plant material. I sorted out little pieces of plastic plant markers, plastic plant pots, and landscape fabric. It didn’t take long before I had an entire 5-gallon bucket of plastic trash that had been generated in my garden! I have been aware for a while that I was bringing in too much plastic for my garden, but this really made it hit home. I seriously need to do something to reduce my plastic consumption.

Picture of plastic trash.

All of this plastic trash came out of my compost pile!

After I got over my plastic shock I moved on to my thermophilic compost piles. I am taking a permaculture course from Matt Powers and have been reading a lot and watching a number of videos about making compost. While watching videos by Elaine Ingham I was convinced that I needed to buy a compost thermometer. I have been making compost for 40 years, but I never measured the temperature of it. I learned that compost needs to be between 130 and 160 degrees and stay at that level for a couple weeks to get the optimum benefit from the compost. Now was the time to see if I was doing it right!

I built three piles just like I always have. They got hot, just like they always did. But they only got up to 110 to 120 degrees, and then fell back to around 100 degrees. When I turned the piles, I added more nitrogen, and more water to try to get the pile hotter. I still wasn’t getting over 130 degrees. I turned the pile again, adding even more nitrogen to the pile. At first, I couldn’t understand what I had done wrong since I built the piles just like I always have. But I realized before I was using my sense of touch and smell to decide when to turn the pile. Now I was using a thermometer. It turns out I have been doing it wrong for decades!

Picture of compost thermometer

I had a hard time getting my compost up above 130 degrees.

I will be using the thermometer from here on out!

A New Favorite Plant

Yep, I have a new favorite plant.

Ever since the Butte Fire destroyed our community a few years ago we have been looking for ways to make our home more fire safe. Our area in the California foothills is prone to wildfires and when one gets going they can be difficult to stop. When they can’t be stopped quickly they become what is known as a campaign fire. In these fires, firefighters go out ahead of the fire and make plans as to which homes they are going to defend and which ones they are not going to defend.

Fire triage form

In a wildfire, homes are often triaged, with firefighters deciding which homes have the best chance of being saved.

There are never enough resources to defend them all, so firefighters pick the homes they are most likely to be successful in defending. If a home is surrounded by trees and shrubbery- wildfire fuels- they are likely to label your home as ‘Do Not Defend.’  Folks who get these labels often do not know it, as their house likely burned down. What you want is to get a ‘triage card that encourages crews to defend your home. When the fire approaches these homes, the firefighters take a stand and defend the home. We are more focused than ever to get a good triage rating.

Picture of Artemisia

Artemisia provides attractive foliage, repels deer, and adds lots of organic matter to the soil.

So this spring I am removing all the plant material that lies within 10 feet of the house. The shredded cedar bark ground cover will be removed and replaced with some variety of rock. Stuff that won’t burn. I have been digging up these plants and transplanting them to other areas. I remember planting these landscape specimens fifteen or so years ago. It was a lot of work. The soil was compacted clay. The new plants were in one-gallon containers, so the holes I had to dig weren’t very big, but that ground was hard!  But going to dig the by now much larger plants out I was pleasantly surprised. The artemisia came out very easily. The soil was rich and dark, full of worms and organic matter. I had added nothing to the soil here over the years. All of that organic matter that the plant was thriving in had come from the plant itself! It was like magic! I need to figure out a way to move that soil somewhere else before I cover it up with rocks!

0W8A1453

This rich soil was compacted clay several years ago when I planted artemisia in it.

We started planting artemisia when our kids were in 4H and my youngest son was raising angora goats. I had read that artemisia, or wormwood as it is also known, was good for keeping goat intestinal parasites at bay. I planted some near the goat barn and quickly learned that the goats did not like to eat artemisia. It was like giving kids medicine. Wait, it WAS giving kids medicine! (See what I did there?) The goats didn’t eat it, but we kept the plants around as a nice filler.

Now it is my favorite plant. (Full disclosure: I adopt a new ‘favorite plant’ nearly weekly.) I planted the artemisia in a hedgerow along the vegetable garden, along with some heavenly bamboo and buddleia. The hedgerow will serve as a home for insects, birds, and lizards, act an a windbreak and repel deer. And the artemisia will work to add all kinds of organic material to the soil over time. My new favorite plant.

Building beds

I started building new beds in the last couple weeks. It will probably take me until next spring, if not the following spring before I finish them. I will probably wait for next fall before anything is planted in them. I am in no hurry. My plan is to build one or two of these each year, so there are beds always “under construction.”

My garden is in an area where some 150 years ago folks discovered gold. That set off an incredible land rush. ‘Forty-niners’ came looking for gold and destroyed much of the landscape in the process. When the gold ran out the settlers turned to logging; cutting the trees for timber and damning up the creeks for power for their sawmills. Next came the cattle. With so much land where the trees were, they ran cattle for decades. Then the land gave out, being poorly managed for over a century. The cattlemen became land developers. The old gold tailings were bulldozed and mixed in with the depleted soils and sold as “ranchettes.” That’s where we came in. My wife and I bought a home on a 3-acre ranchette. We had dreams of a self-sustaining small homestead. Those were great dreams but, alas, we didn’t know what we were doing and picked a poor spot.

The land is depleted land; our homestead is three acres of solid clay mixed with mine tailings. If you try to work the soil in the winter you find yourself knee deep in muck. If you try to work it in the summer it is like trying to dig in concrete. Neither approach results in a decent garden, let alone a homestead. We had to find a different approach. We found one. We built raised beds on top of the “soil.” No double digging like I learned reading Jon Jeavons book years ago. That just isn’t possible here.

I start building a bed by laying some old, punky wood on the ground. Sometimes it is old firewood that I ran through a compost pile or two. Sometimes it is burned wood, salvaged from nearby wildfires, sometimes it is scrap 2×4’s from various projects. And sometimes it is wood that floated down the creek from parts unknown. I am not talking about a full-on Hugelkultur. We learned from experience that in this area those quickly become dorms for a variety of ground-dwelling rodents! I don’t want a lot of wood, just a single layer of various sizes, shapes, and types.

There is no digging or measuring, That’s not how I roll. I just lay the wood out in approximately the place I want the bed. Then I start piling on dirt. Not all at once, I don’t want to work that hard! Just a little at a time. I will wander around the property looking for gopher, mole, vole, or ground squirrel holes and scoop up the dirt around the hole. (I am sure to thank the ground-dwelling rodents for their work as I scoop up the dirt!) I use dirt from cleaning out the culvert under the driveway. I will use dirt that has eroded from higher ground. I use any dirt I find. That is partly why it takes so long to build a bed. The bed is mostly made of scrounged stuff. I will add buckets full of flotsam gathered from the high watermark of trees in and around the creek to add organic matter. As the year progresses I will add small clippings from the willow trees that are so abundant around here. Anything I can that adds organic matter goes into the bed. Once it is finally near the size I want it to be (in a year or two) I will start dumping compost on top. I use both store-bought and home-made. (I can’t make near enough compost at home. Yet.)

Picture of a raised bed.

A raised bed under construction. The rock edge will be completed all around the bed, then thyme and snow in summer will be planted between the rocks.

Once the bed is the right size, I begin bringing in rocks to form the sides of the bed. The rocks define the bed and serve to help warm it up in the springtime. I plant low growing ground cover perennials among the rocks. Strawberries, thyme, snow-in-summer and the like. These plants help hold the rocks in place, and serve to shade the rocks in the summer, so the bed does not get too hot.

Once the bed is in place I will plant a fruit tree or two, and several perennial edibles. Asparagus, rhubarb, and horseradish are among the favorite choices. I will then fill in the remaining space with annuals for a couple years. When the perennials are established and the soil is a fungal dominate one the annuals will no longer do well. I will fill in the spaces with other perennial plants and move the annuals into the other new beds, starting the whole process again.

That’s the process, now I have some dirt to go gather.


What to Plant?

It is February, and for me, that has always meant that it is time to go over the seed catalogs to decide what to plant in the coming year.  Not just seeds, but plants and trees as well. This year I am concentrating on my zone 1 kitchen garden. I have been working this garden for about three years now. I am working it to become a mix of annual and perennial plants. Mostly, but not all of the plants will be food bearing. The area has heavy ground-dwelling rodent (ground squirrels, gophers, and moles) and deer pressure, so the mix of plants has to be very diverse to try to confuse these animals and therefore limit the damage they inflict. That is the plan anyway.

The garden consists of two small hugelkulturs I installed three years ago. These have settled a good deal, and I will be converting them into raised beds with river rock sides. The rock will help warm the soil in the spring. The paths between the beds are being covered with charred tree bark. There is also a couple cedar raised beds, and some metal barrels used for things like garlic and onion that have not been able to survive the rodent pressure any other way. I have plenty of room to expand this garden in the future. I am limiting the size and scope of the garden based on the time I have to work it.

Here are the perennial plants that will be in the garden by the end of this year:

Alfalfa. This will be grown amongst all the other plants in the garden and serve as a chop and drop cover crop, and the roots will fix nitrogen in the soil.

Artemisia. This plant grows well here, and the deer and rodents don’t seem to like. It has a number of medicinal uses. It also produces a lot of biomass that can be used as mulch or compost.

Asparagus. We love to eat fresh asparagus. Especially the tender spears in a salad or stir-fry. The plants do well here. I have several planted, and more going in this year.

Blueberries. There is nothing like fresh blueberries. I am experimenting with different varieties to find the ones that grow best on this land.

Butterfly Bush. This makes a great mixed hedge around the garden. It grows six or seven feet tall and very bushy, making an ideal screen to confuse deer and keep them out of the garden.

Comfrey. I have a lot of comfrey in the garden already. I use it as a mulch. It has medicinal properties that I will explore both as a dried leaf and as an oil.

Cranberries. I like to eat cranberries, and they are healthy. I will be experimenting to see how it does here.

Figs. I love figs. I do have a concern about the cold hardiness of the figs. I need to experiment to find a very cold hardy variety. The mature fig trees will provide food for the family, some wildlife food, and needed shade in the garden.

Lavender. We grow a lot of lavender. It attracts pollinators, especially mason bees. The plants stand up to the ground rodents, and the deer do not like it. We harvest the flowers and this year will be distilling the flowers for oil. The flowers are edible, but no one in my family cares for the taste.

rose

Minature roses. My wife and I love roses. I have found they do very well among the strawberries. The roots provide some permanence to the soil food web, and the flowers attract pollinators. The flower petals can go in salads.

Plum. Stone fruits have not been productive on our cold little spot of land, but I am thinking winters might tend to be warmer in the future. If I am right I get great fruit, if I am wrong I get shade for the understory and leaves for mulch.

Pineapple guava. This evergreen is hardy enough for this land. I enjoy the fruit, and the evergreen plant is attractive in the garden.

Pomegranate. Who doesn’t love some pomegranate seeds in a salad! I have recently learned that I can use the young leaves in a salad as well. That is good news because summers are hot here, and mid-summer salad greens are tough to find! I have a variety in the garden that is hardy enough, but I want to add another for diversity.

Pyracantha plant

Pyracantha bushes produce loads of red berries in the winter.

Pyracantha. This thorny bush provides a barrier for against deer. It is not edible- as far as I know- but robins love the red berries in winter. And I love to watch the robins eat the berries. My wife also loves to see the bright green foliage and bright red berries in the otherwise dreary winter.

Quince. I have a bunch of apples in the orchard, but no quince. I want to give it a shot with two varieties. They will provide some shade for the understory plants.

Rhubarb. This is being grown because sometimes you do not have enough strawberries for a whole pie, and so you can add the stalks! The huge leaves also shade the nearby soil, and the roots help with diversity for the soil food web.

Rugosa rose. We love roses. Rugose roses provide food for pollinators, petals for salad a deer barrier, and finally rose hips for tea in the winter.

Russian sage and Mexican sage. Both of these plants produce beautiful blue flowers that attract pollinators and provide shade to smaller plants. They also repel the local herbivores.

Sage. We also grow a lot of sage. White sage, tricolor sage, and golden sage. Like lavender, it resists the local herbivores. We can use it for cooking, but mostly we use it as an attractive focal point in the garden. While blooming it attracts many pollinators.

Snow in summer. This plant drapes gracefully over rock raised beds, providing needed shade in the summer. The very attractive small white flowers provide food for the pollinators. The grey-green foliage resists herbivores.

Strawberry plant

Strawberries hanging over a rock bed, nestled between golden thyme and snow in summer.

Strawberries. I love strawberries! Fresh, frozen, or dried, I can never have enough! I grow them on the edge of rock sided raised beds, and in the voids of these beds. They help to shade the rock walls in summer, keeping the beds cool.

Thyme. We grow a lot of thyme. It is a great groundcover that seems to resist the rodent pressure. I will be planting a number of varieties along the bottom edge of the rock planters where they meet the charred bark paths. Elfen thyme will be planted in the voids of the rock planters. The plant makes fantastic little cushions for the strawberry fruits to nestle in.

White Clover. Clover is a great ground cover that also fixes nitrogen. It will be planted wherever I find bare soil.

*Edit- this list is periodically updated as new plants are identified.